
Create a configurator
Create your first configurator.
Add your product. Build the experience.
Connect your website.
01Start
Start with your product.
Choose how to start, then add your product files.
01Choose or drop your product files.
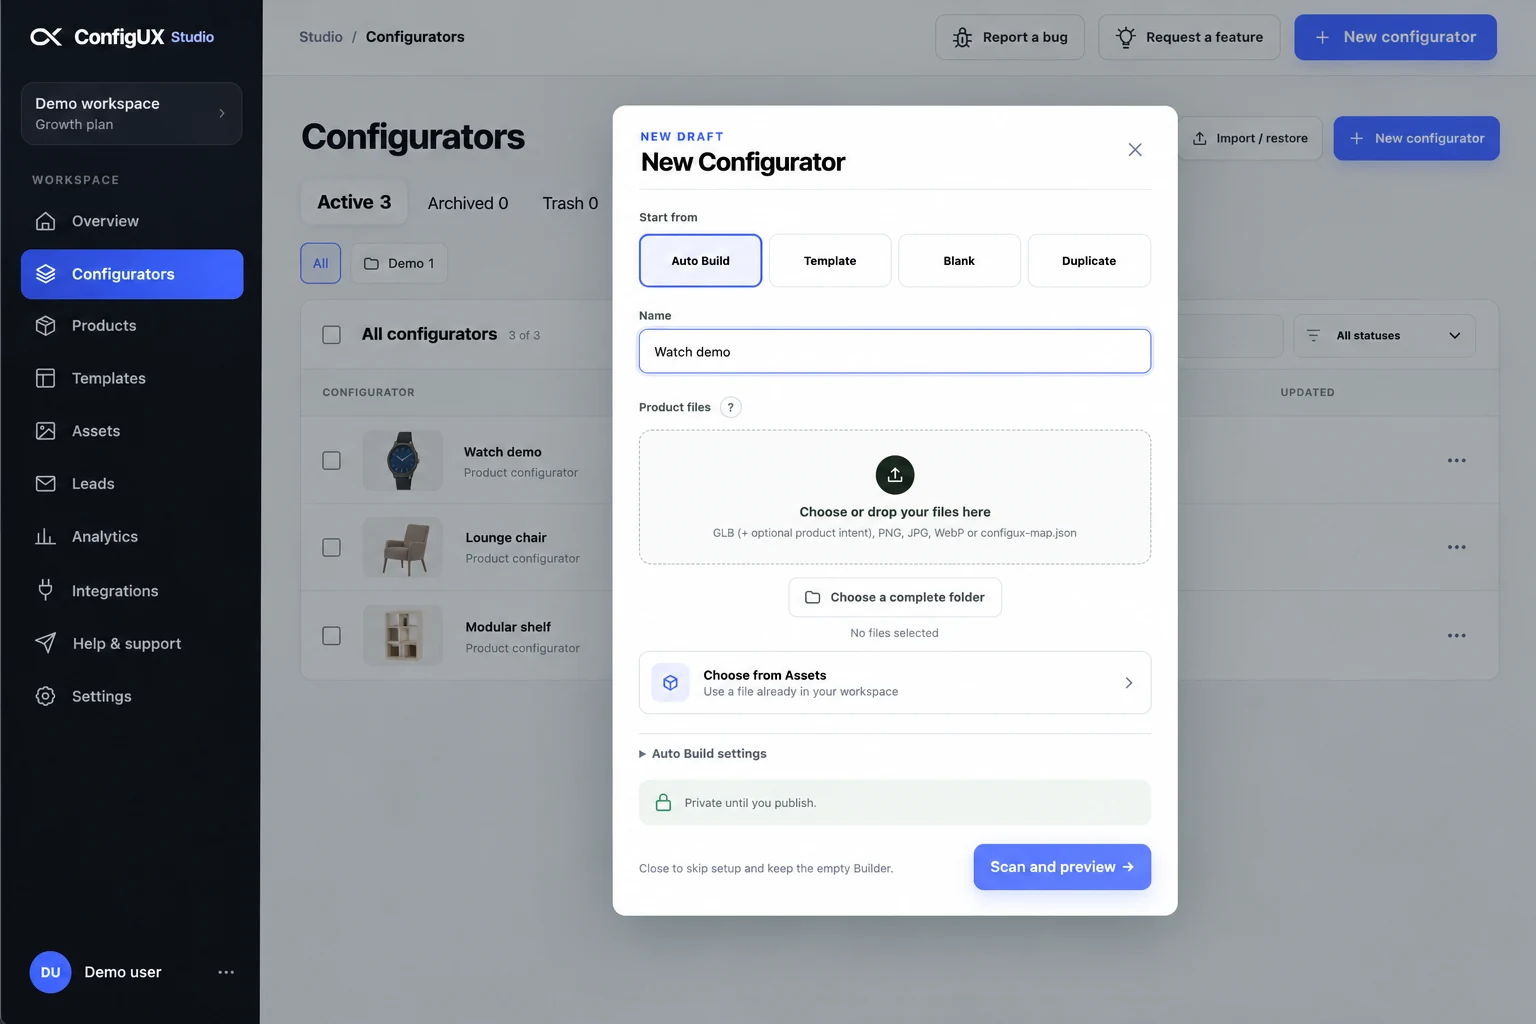
What can I start with?
Choose Auto Build, a Template, a Blank configurator or a Duplicate. Add product files or choose files already in Assets. With Auto Build, scan your files and review the proposed setup before continuing.
02Build
Make it yours. Drag and drop.
Arrange elements, add choices, and shape the buying experience.
- 01OptionsAdd choices
- 02MappingConnect visuals
- 03PricesSet prices
02Drag Heading into your layout.
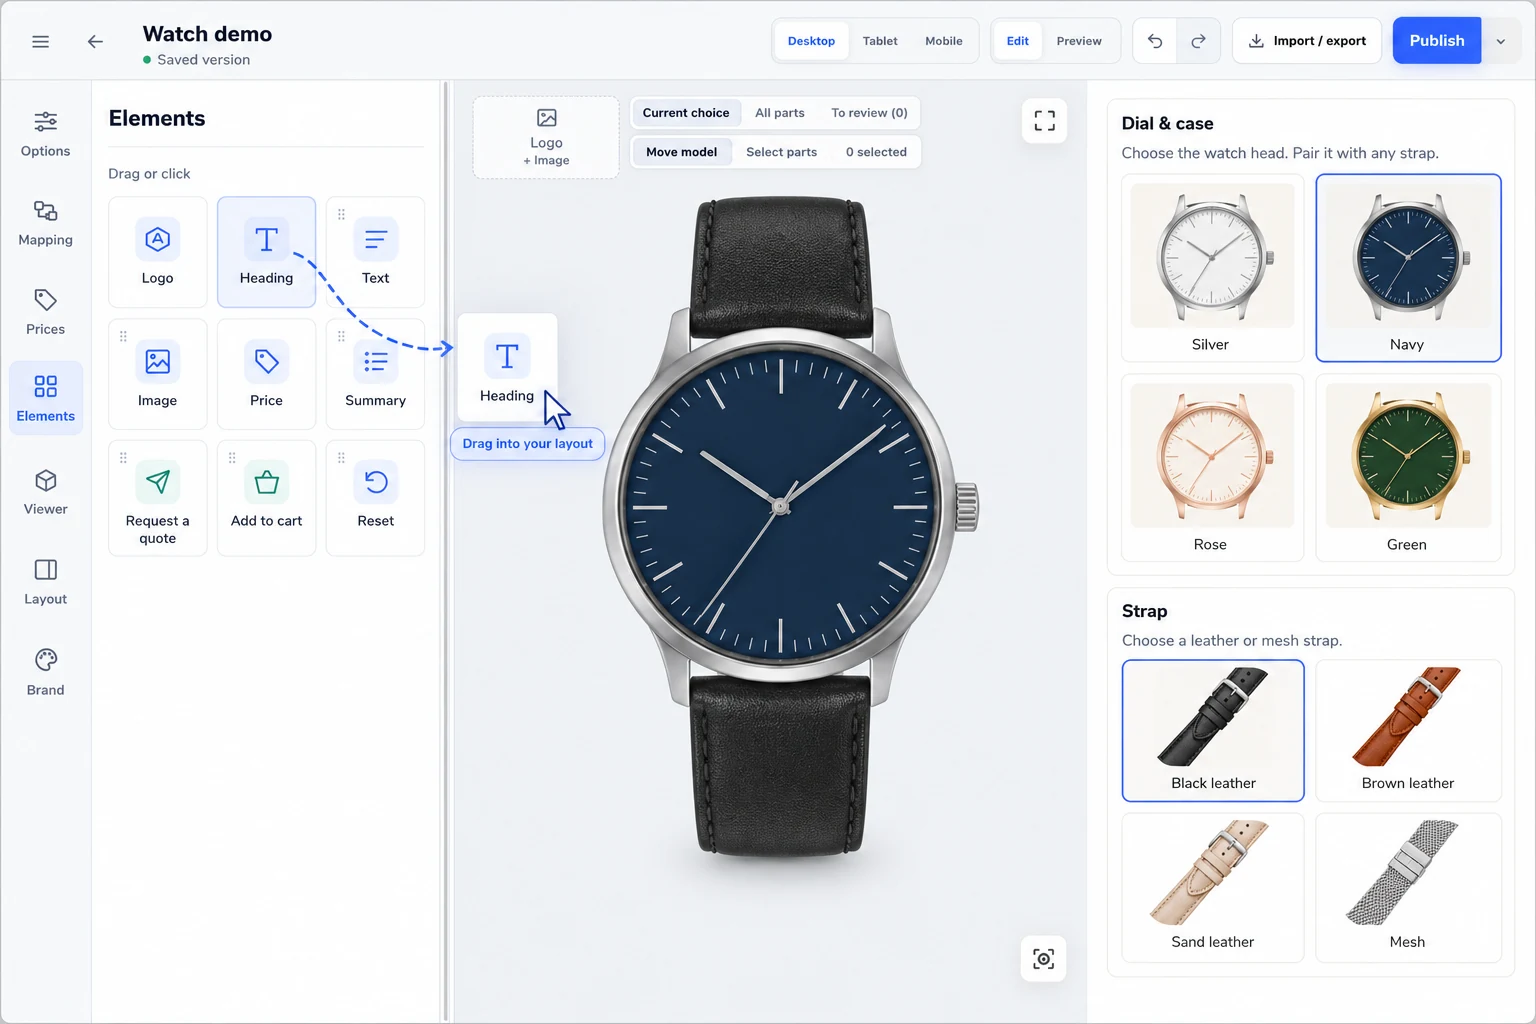
How do choices change the product?
Use Options for the choices your buyer sees and Mapping to connect them to images or model parts. Set prices in Prices, then adjust the presentation with Layout and Brand. Drag elements such as headings, images and a quote button into your layout.
03Preview
See it as your customer does.
Change a choice. See the product update. Then check the experience before publishing.
03Choose Green. See the watch change.
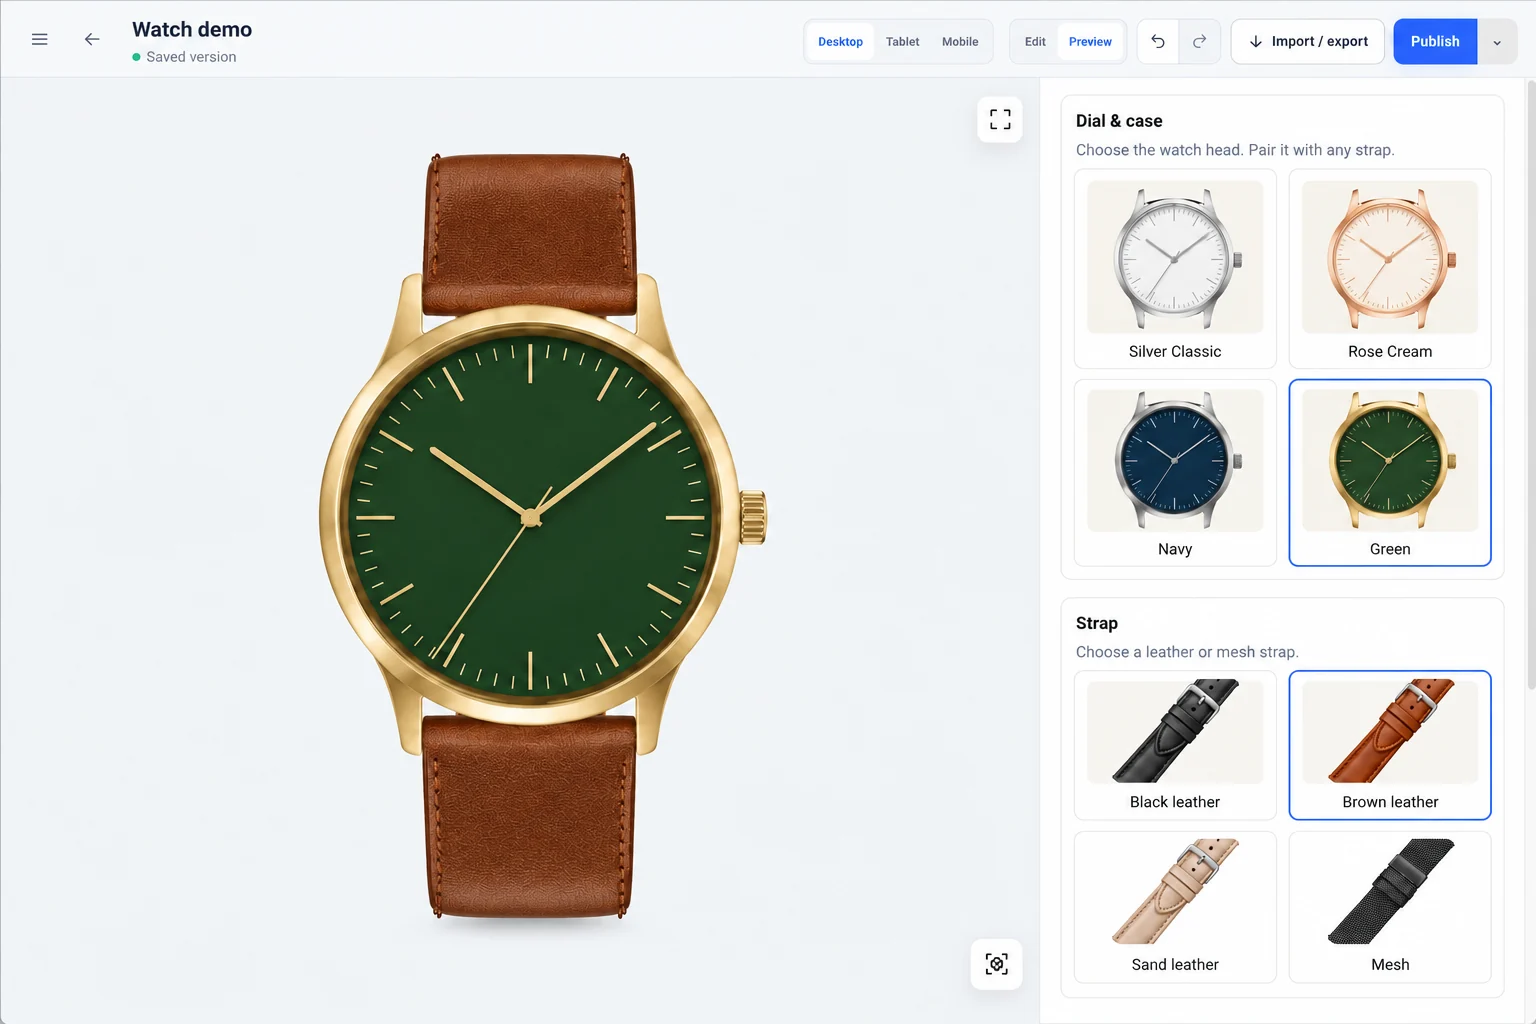
What should I check before publishing?
Try your choices and confirm the product view, labels and prices. Switch between Desktop, Tablet and Mobile. Check that the next action, such as requesting a quote, is easy to find and works as intended.
04Connect
Bring it to your website.
Publish, choose your website, and follow the installation steps.
04Select your website, then Copy HTML.
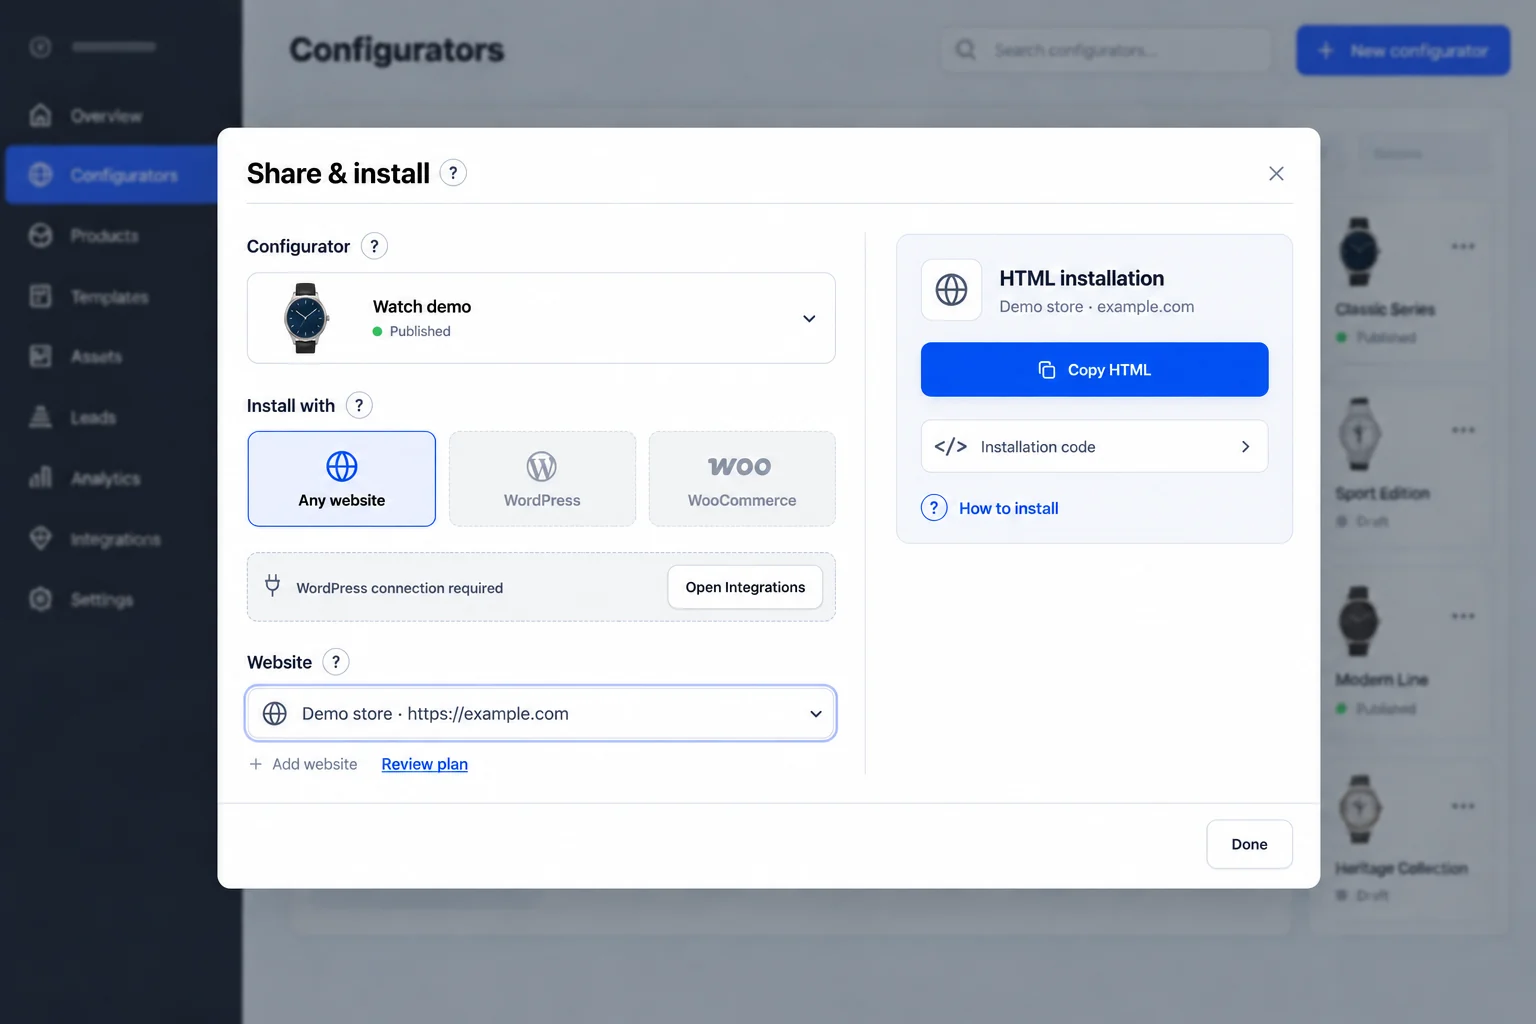
How do I get the installation code?
After publishing, open Connect from your configurator list. In Share & install, choose your website and installation route. For HTML installation, use Copy HTML when it becomes available. WordPress and WooCommerce require their connection in Integrations.
Need help preparing your files?
Start with the right product assets.
Ready to create yours?
Open ConfigUX Studio Or talk through your product with usIllustrative Studio screens with demo products and anonymised data.